 Today calls for a celebration!
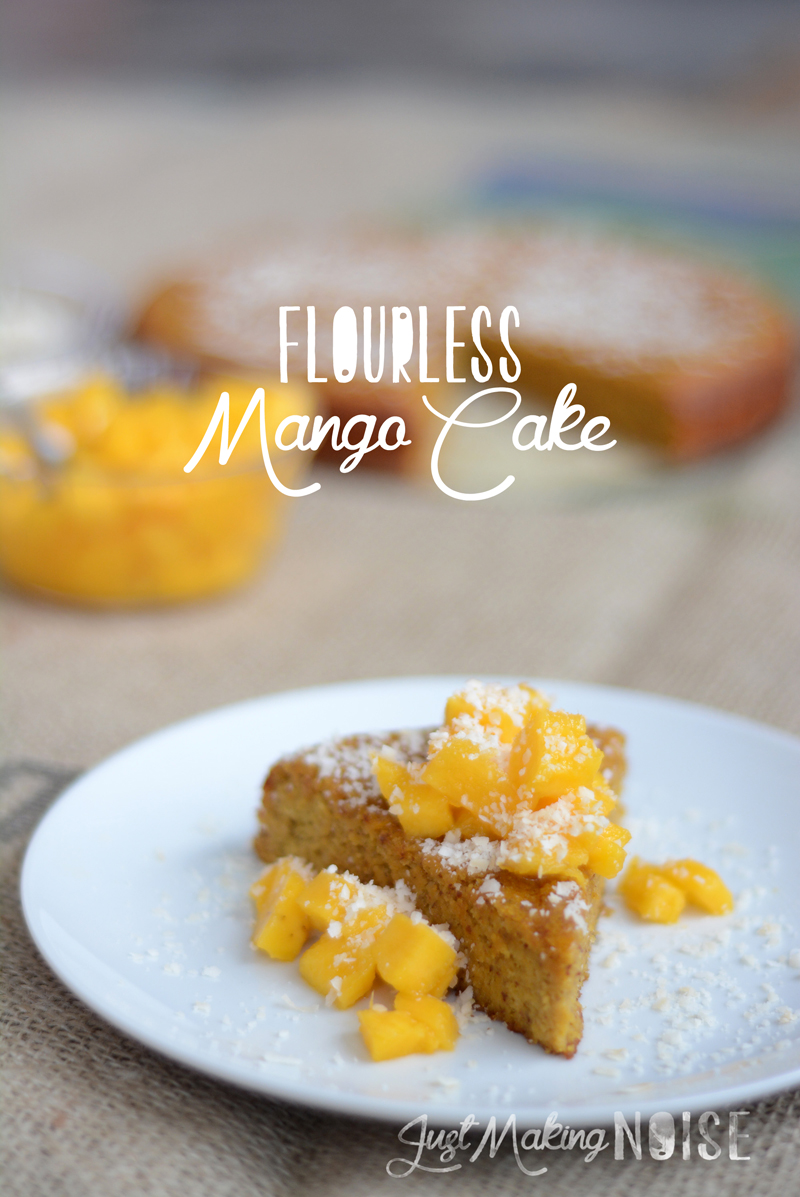
To celebrate, I wanted to share with you this amazing grain-free cake that I actually made…uummm… last year. Believe me, I really wasn’t trying to keep this recipe from you… I basically saved it in a “future blog post” folder and forgot about it because life is so busy, but I am glad that happened! Otherwise, we wouldn’t have a cake to celebrate today.
Anyway, seriously, this cake is amazing. The highlight is the moistness… its amazing. Even my hubby, who prefers pies over cakes, complimented on how moist the cake was and asked for seconds after devouring his first slice. I’ve made this cake a few more times since then and the family loves it every time.
And what are we celebrating?
 The first day of MANGO MADNESS WEEK!
We are overflowing with sticky ripe mangoes… 600 to be exact.
“What?! Why 600 mangoes?!”
Because we love mangoes… do we need to have a better reason than that?!
Anyway, around this time of year it when mango season hits Honduras, but it is a very short season. Way too short and you have a very small window of opportunity to get it right when they are in their prime. This is the 3rd year we’ve done this and I look forward to it every time… the sticky sweet smells and orange stained finger nails from cutting and slicing mangoes every. single. day. for at least a week.
Yeah, its a lot of work, but so worth it!
Last year we filled a 3.5 gallon bucket with dried mangoes that I dehydrated myself and froze over 30 gallon zip lock bags of mangoes. We still have at least 4 more bags left from last year!
This year it is my goal to more than double the amount of dried mangoes (my FAVORITE snack) and do a little less freezing. I already have an Excalibur dehydrator that I’ve owned for over 5 years now, but I decided to go ahead and purchase a Nesco dehydrator that I found on Amazon for a sweet deal. Both will be busy working overtime over the next couple weeks!
With all the fresh mangoes we have here, we will for sure be enjoying them fresh everyday. I like to scoop a mango in a bowl and drown it with kefir as much as possible. The delicious combination of tangy and sweet is simply addicting!
But I also plan to whip up several of my favorite mango treats, such as honey-sweetened mango curd, mango butter, mango blackberry swirl ice cream pie, mango coconut pie and I need to make my mango-ginger beef roast for dinner sometime next week! I also plan to try new recipes with mangoes… if you have a recipe or two that calls for mangoes, please share it in the comments below!
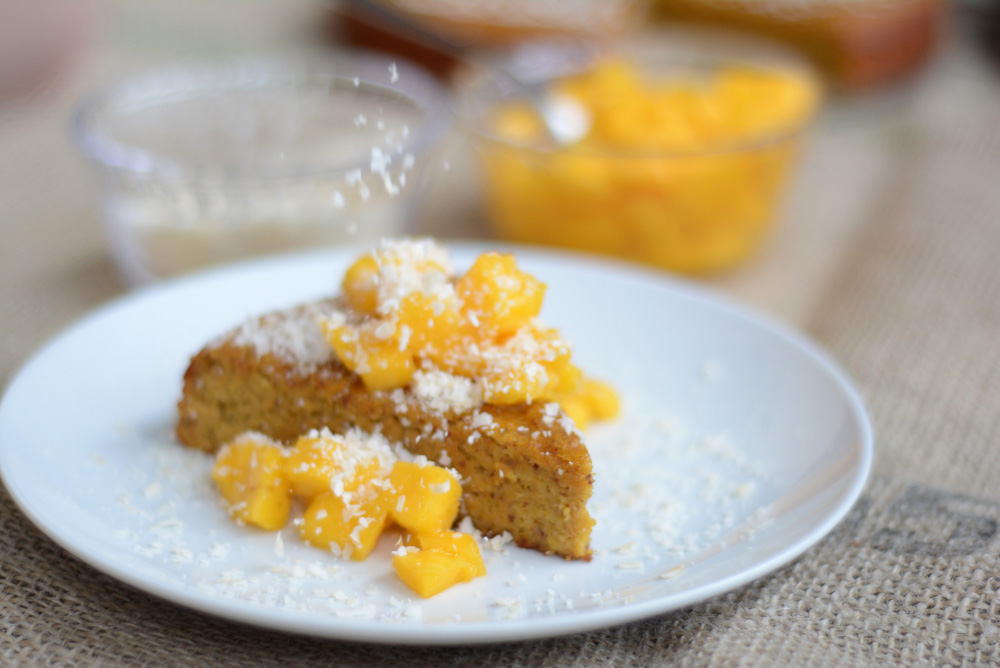
With this cake you will find its sweetness light and satisfying while the texture is somewhat dense and very moist. Totally a summer cake that would be perfect served at a picnic or tea party!
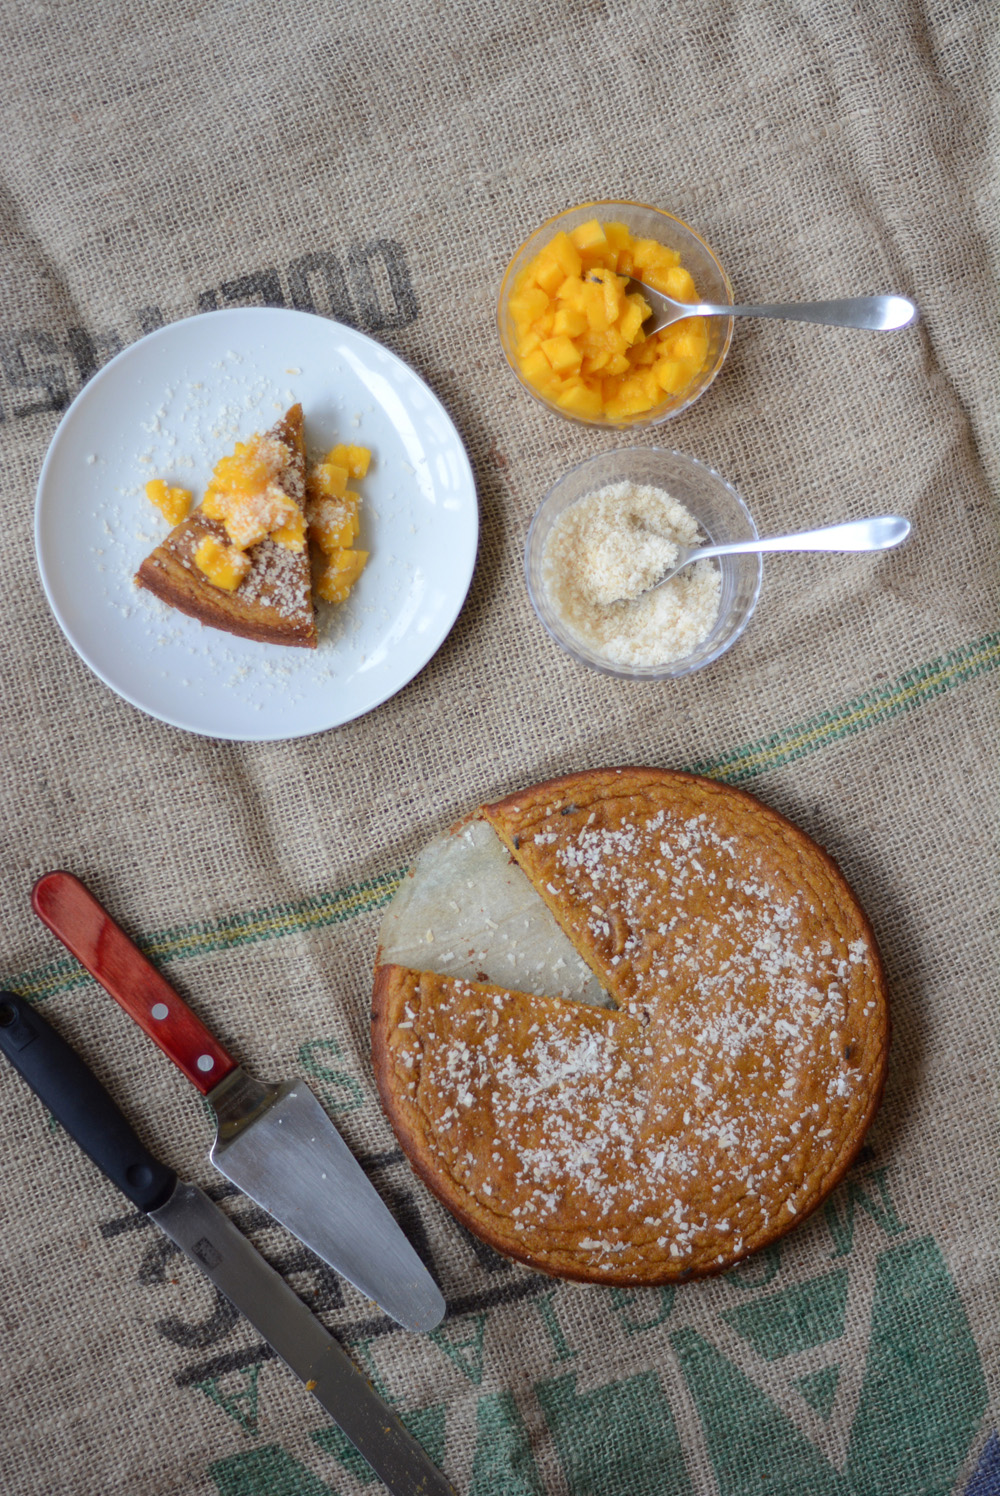
I like to serve the cake topped with either fresh mango or mango curd because the mango flavor is so mild. Both toppings bring out the flavors of the cake just beautifully. I also like to “dust” our cake with grind up coconut flakes instead of the usual powdered sugar that you often find on flourless cakes.
Are you sold now? Don’t wait any longer… get in your kitchen and make this awesome cake!


- 2 cups diced fresh or frozen mango
- ½ cup coconut sugar or rapadura
- 3 eggs
- 1 tsp vanilla extract
- ¼ cup melted butter or coconut oil
- 2½ cups almond meal
- 2 tsp baking powder
- Preheat oven to 350 F.
- Line the base of a 9" springform cake pan with baking paper and grease the sides, if needed.
- In a food processor or blender, mix together mango, sugar, eggs, vanilla extract & butter or coconut oil. Pulse until well mixed.
- Add the almond meal and baking powder and pulse again for a few seconds the batter is smooth.
- Pour the batter into the prepared cake pan and smooth the top.
- Bake for 40-45 minutes or until golden brown.
- Remove from the oven and allow to cool in the pan for at least 10 minutes. When cooled enough, turn the pan onto a serving dish and allow to cool further before serving.
- Serve topped with fresh mangoes or mango curd along with a dusting of grounded coconut flakes. Enjoy!
I used a 9" springform pan, but you can use a smaller one. Just be prepared to bake it for a little longer if needed.
I’m always on the look out for mango recipes. Please share your favorites below! ]]>


But my all time favorite memory were the brownies my mom would make once a week and served with a big scoop (or two) of my dad’s homemade strawberry ice cream.

My husband commented that this ice cream tasted very much like a cheesecake ice cream, even though I used coconut milk instead of dairy. I believe it the combination of tangy balsamic vinegar and sweet strawberries along with the nutty milk gave it that yummy flavor.
I chose this ice cream flavor to make ice cream sandwiches specifically for a friend’s birthday. I wanted to go the extra mile for her and make something special, but I had to make over 30 ice cream sandwiches! That’s why I simplified the ice cream recipe…


- 6 cups whole strawberries (fresh is best, but frozen is fine)
- 2-3 Tbsp coconut sugar
- 2 Tbsp balsamic vinegar
- 2 cups coconut milk (or milk of your choice)
- ¼ cup coconut sugar
- pinch of sea salt
- 1 heaping cup of roasted strawberries
- MAKING THE ROASTED STRAWBERRIES: Remove the stems and rinse the strawberries in cool water. Place them in a strainer.
- Slice the strawberries and place them in a large bowl. Toss with coconut sugar and balsamic vinegar. Let them sit for about 10 minutes.
- Preheat oven to 375 F. Pour the strawberries and juices into a large ovenproof dish.
- Roast them in the oven until they start to caramelize, juices are bubbling and strawberries are hot (but not mushy). About 15-20 minutes.
- Scoop the the strawberries and juices into a container and let them chill in the fridge while preparing the ice cream base.
- MAKING THE ICE CREAM BASE: In a medium bowl, mix together coconut milk, coconut sugar, sea salt and roasted strawberries.
- Pour the mixture in your ice cream maker and follow the manufacturer's instructions.
- When ice cream is done churning, quickly scoop it into a container and serve right away or let it firm up in the freezer for a couple hours before serving.
 ]]>
]]>
Let’s be honest… breastfeeding can be painful. Especially the first week and when your baby starts teething!
When I was pregnant with #1, I had romancing visions of happily cuddling & nursing my sweet little baby… oh man, all that went out the window at the first latch.
After the first few nursings… my nipples were painfully sore and cracked.
After almost 3 days of nursing… I was grinding my teeth & curling my toes every time my baby latched on. I was not prepared for the pain! I wished someone had said something about that important little big detail while I was pregnant!
But I made it through… with some lanolin and lots of prayer.
Concerns about Lanolin
I don’t know about you, but I really hated using that common lanolin stuff on my nipples! I felt that it didn’t help much. I hated the oily feel and the stains it left on my bras & shirts. I did not feel much relief and found it uncomfortable on my sore nipples.
What exactly is Lanolin? I didn’t know until I did some research and found out that Lanolin is the greasy discharge from a sheep’s sebaceous glands. It is used in all kinds of cosmetics, from lip balms, shaving creams, hair products to breastfeeding creams. Although it has been touted as highly effective in soothing & healing chapped skin (but not for me!), lanolin usually contains a heavy load of pesticides from the wool being soaked in chemicals to remove parasites before the lanolin is scoured out of it.
Since your baby will basically be ingesting small amounts of whatever you smear on your nipples, it is critical for the ingredients to be safe (in my humble opinion). Many mamas swear by lanolin, but I rather use more natural ingredients that are 100% edible and safe! At the moment, there are no organic options for lanolin out there.
Unfortunately and completely clueless at the time, I used lanolin with both my first and second babies… after that, I promised myself to find a different alternative.
Finding an Alternative Relief
Thankfully, it was my mom who found it. A herbal nipple cream called Motherlove that she picked up at Whole Foods. I used it after Tobias was born and…
- LOVED. IT.
It smelled good, did not feel oily, felt really soothing, absorbed quickly into my skin and did not stain my bras & shirts. I clearly remember my nipples healing very quickly… like 4 or 5 days! I used it again with Poema, my 4th baby, and got the same results.
Y’all, that’s a big deal!
Why? Because both my midwives (from my 1st & 2nd births) have told me to bear the pain of nursing for 10 days, use lots of lanolin and then I will be fine. True enough, by the 11th day… the pain was significantly less and breastfeeding became a much more pleasant experience.
But now I think that 10 days of pain can be cut in half… using the DIY Natural Nipple Cream!Of course, every mama has different experiences with breastfeeding and some take longer to heal and get the hang of breastfeeding. I truly hope this cream will help lessen the pain, speed healing and shorten the time it takes for your nipples to get used to be sucked on by a hungry little mouth! Ouch!
Buy it or Make it?
The Motherlove nipple cream is a little pricey for such a small bottle and I only used about half of it during the first couple weeks of nursing Tobi, but to me… it was worth it!
Of course, I wanted to try making my own… simply because I enjoy DIY projects and wanted to save a little money. I looked high and low around the internet for a recipe, but didn’t find much. Most simply said to use 100% coconut oil or a combination of coconut oil, beeswax, cocoa butter and shea butter… but was I looking for something more similar to the Motherlove nipple cream.
Later, after learning how to make a few different kinds of salves/creams… I took the basic salve recipe, the ingredients from Motherlove and set out to make my own natural nipple cream.
I’m glad to say that it was a success! I have been able to use it as my 4th baby is still nursing pretty strong at 18 months old. The small amount I made was enough for me to share with another mama who recently had a new baby. She loved it and noticed quick relief from using it.

The Ingredients & Its Benefits
Below you will learn how each ingredient is very healing for those sore nipples! For those who might be concern… this natural nipple cream is completely safe for the baby. I have used this for my 3rd and 4th babies with no concerns or side effects.
In fact, with Poema still nursing at 18 months and has teeth now… I still use the nipple cream whenever I start to feel little sore. If you are not convinced, then you can simply wipe off the cream just before you nurse, but it will most likely already absorbed into your skin.
- Marshmallow Root: The genus name comes from a Greek work meaning “to heal”.This herb contains some germ-fighting and inflammation-relieving phyto-chemicals. It also contains compounds that help stimulate the immune system slightly. Marshmallow Root is known to help with bruises, chafing, sores and wounds… which is beneficial for the nursing mama!
- Calendula Flower: A herb long used through Europe and the Americas for wound healing and ulcer treatments, Calendula is known for its amazing healing properties. The phyto-chemicals in these flowers opposes fungi, bacteria, viruses and inflammation. Calendula also excite the white blood ells in the immune system to fight microbial invaders with a little more vigor. It is good for treating skin problems of all kinds, especially cuts, scrapes, bruises and minor wounds.
- Extra Virgin Olive Oil and/or Coconut Oil: Both oils help promote healthy skin regeneration, fight off infection & thrush and moisturizes the skin.
- Beeswax: Helps to keep needed moisture in the skin, promotes new cell growth and protects the skin.
- Shea Butter: Moisturizes, protects, strengthens and regenerates the skin. It is great for minor cuts and cracks in the skin.
Making the Natural Nipple Cream
Thankfully, making nipple cream is super easy. I ordered my herbs & beeswax from Bulk Herb Store and the shea butter from Mountain Rose Herbs, but you can purchase all the ingredients at Mountain Rose Herbs. I love both companies and love their quality & prices! You can also purchase most, if not all, of the ingredients on Amazon.com too.
I am sure most of you already know this, but I feel it is important for me to say that It’s highly recommended to use organic oils. When making my batch of nipple cream, I used 100% organic olive oil and loved the results. If you prefer, you can use a combination of coconut oil and olive oil or 100% coconut oil… whatever you like or have in hand!
Once you’ve made the natural nipple cream, you can start using it even before your baby is born! Rubbing the cream into the nipples throughout the latter part of your pregnancy and the beginning weeks of nursing will create healthy, flexible tissues that will be more resistant to cracks, tears and chapping.

Natural Nipple Cream
1/4 cup Calendula
1/4 cup Marshmallow Root
1 cup Olive oil and/or Coconut oil
1/8 cup Beeswax
2 Tbsp Shea Butter
Scoop herbs into a glass canning jar and pour oil on top. Make sure there is at least one inch gap between the mixture and top of the jar. Screw lid on tightly.
Set out a medium size slow cooker and line the bottom with a thick hand towel. Place the jar inside and fill the slow cooker with water up to the level of the oil in the jar, but keep the water level below the lid.

Turn the slow cooker on the “warm” setting and leave it on for 3 to 5 days, partially covered. Add more water into the cooker when necessary.
After 3 to 5 days, remove the oil infusion from the cooker and let it cool a little. Strain the oil through a fine sieve and/or cheesecloth into a small stainless steel sauce pan. Squeeze with your hands or use the back of a spoon to release the finished oil. Throw the used herbs away.
Add beeswax and shea butter into the sauce pan and turn heat on low. Stir until wax and butter has melted. Pour the mixture into 4oz glass jars or 4oz tin cans. Allow them to cool completely before putting the lids on. Date and label the nipple cream. Keep them in a cool, dry and dark spot. Will keep for several months.

With the recipe above, you should be able to fill three or four 4oz tin cans or jars pretty easily. You will most likely only need one for yourself and the extras will make fantastic gifts for your mama friends! I would love to make a gift basket with all my natural remedies to give to a mama friend… one day I will do it!
Think you can tackle this easy DIY project? For those who have made this cream and used it… Did it help your sore nipples? Did you noticed anything different?
Note: The links above are my affiliate links and I will earn a small commission if you decide to order the herbs through those links (no charge to you!). Thank you for reading this and supporting my family through your purchases!


Herbal sitz baths are extremely soothing, relaxing, healing and a great way to pamper a new mama after going through the tiring workout of laboring and birthing a little baby.
What are Sitz Baths?
Some of you might have never heard of a sitz bath. I sure didn’t know heck about it until my midwife explain it to me. A sitz bath is literally what it sounds like – a bath where you sit in warm water that covers the buttocks and hips.
Sitting in warm, herbal infused water helps clean the sensitive area, bring healing, soothe soreness, aid in shrinking hemorrhoids, prevent infection, relieves pain, reduces swelling, heals tears and increase blood flow to the areas starting at your belly button, down around to your lower back bone & to the where the baby made an appearance. These herbs can truly help speed along recovery!
You can do your sitz bath in the bathtub or in a large bowl, but make sure you have someone to help you in and out. After my 2nd & 3rd babies, I used my kids’ little bathtub and it worked great, but this 4th time around… I was able to use an actual bathtub and enjoyed a long soak! Taking a relaxing bath is a rare treat for me 

My First Sitz Bath
My midwife brought a bag of herbs over and prepared my first sitz bath after Tabitha’s birth. I was eager to give it a try, but was a little skeptical that it would do much to relieve the little pain I had from my tear.
I was so wrong… It was amazedly soothing and totally won me over. I took a sitz bath everyday for a week and wanted more!
Plus, I noticed rapid healing of my tear along with putting on a combination of aloe vera, coconut oil and raw honey. I am thankful to say that I never tore again with my 3rd and 4th babies.
I, of course, asked her for the recipe when I became pregnant with Tobias. Unfortunely, her recipe called for a lot of herbs… making it a little too expensive for me to make a small batch for myself.
So, she recommended simply using a combination of Lavender, Chamomile, Rosemary and Calendula Flowers… much like the ingredients used for the Soothing Postpartum Pads! I also decided to add in Comfrey leaf as it is excellent to use on a stretched & sore perineum, Yarrow for is ability to stop bleeding and sea salt which provides needed minerals to help speed healing.

The Ingredients & Benefits
Below you will read the medicinal properties of each herb that help pamper and heal the new mama. This Healing Postpartum Herbal Sitz Bath will leave you feeling refreshed, renewed and relaxed.
- Chamomile Flowers: This herb is best known for its soothing & delicious aromatic smell and taste. It is widely used as a mild sedative. Chamomile displays a wide range of healing properties such as being anti-inflammatory, antibacterial, antifungal, antiseptic, antispasmodic and even anti-body odor… all coming from the daisy-like flowers, which contain volatile oils as well as flavonoids. It also improves wound healing, which is great for tears and c-sections, along with bringing good flow of blood to the skin surface thus inducing perspiration and helps regulate menstrual flow. Chamomile is one of the best herbal sources of niacin, magnesium and essential fatty acids.
- Rosemary Leaf: Called the “herb of remembrance” by Shakespeare, this herb has the ability to strengthen the entire body and relieve pain (like lavender) associated with muscle pains, sore muscles & headaches. Rosemary helps boosts mental activity, so when your brain feels tired (and we do feel brain-tired after birthing a baby!), take deep breaths as you enjoy the sitz bath for fresh mental energy. It also contains good concentrations of 2 dozens or so antioxidants.
- Comfrey Leaf: The latin name of this herb translates “knitting together”. One of the main healing properties in comfrey is allantoin, an anti-inflammatory that perks up the immune system, speeds wound healing and encourages new skin and cell growth. It has a long history of being used as an external application for mending of wounds and broken bones. Comfrey is a contact healer, relieving pain and immediately helping the growth of new flesh and bone. It is also high in calcium and vitamin C.
- Yarrow Flower: Considered the “poor man’s chamomile”, Yarrow contains a volatile oil which is similar to chamomile and has been medically documented to be very effective anti-inflammatory agent. It contains aromatic compounds that shrink inflamed tissues and promote sweeting. It also contains bitter compounds that relieve smooth muscle spasms, reduce blood pressure and helpful in stopping bleeding from hemorrhage. The herb has antibacterial and antifungal compounds that are helpful in replenishing the intestinal flora.
- Lavender Flowers: Best known for its relaxing effect on the mind and body, Lavender’s soothing properties is readily absorb into the skin and not only promotes restfulness, but it helps in treating pain, anxiety & nervousness, exhaustion, restlessness, emotional stress, headaches and increase mental activity. It is also an excellent remedy for various types of pains caused by sore muscles, tense muscles, muscular aches, backaches and the lumbago (lower back) area. Lavender is excellent for improving blood circulation in the body, which is essential for complete healing in the perineum area. It also has antibacterial, antifungal and antioxidant properties.
- Calendula Flowers: A herb long used through Europe and the Americas for wound healing and ulcer treatments, Calendula is known for its amazing healing properties. The phytochemicals in these flowers opposes fungi, bacteria, viruses and inflammation. Calendula also excite the white blood ells in the immune system to fight microbial invaders with a little more vigor. It is good for treating skin problems of all kinds, especially cuts, scrapes, bruises and minor wounds.
- Sea Salt: A natural detoxifier, sea salt provides the needed minerals to help the body heal quickly.

Healing Herbal Sitz Bath
2 cups chamomile flowers
2 cups rosemary leaf
2 cups comfrey leaf
2 cups yarrow flowers
1 cup lavender flowers
1 cup calendula flowers
2 cups sea salt
Mix all the herbs & sea salt together in a large bowl. Store in a glass jar and keep in a cool & dry place.
Fill a large pot with 1 gallon of water and bring to a boil. Remove from heat and add 2 cups of the herbal mixture or stuff the loose herbs in cotton muslin cloth bags. Cover and let it sit until warm. Strain (or pour it all in if you don’t care about loose herbs!) liquid into a bathtub or large bowl/basin and add warm water until it covers your hips & buttocks.
Sit and relax in tub for 20 minutes or more. You can soak with your baby as it will speed along cord healing. If using bowl or large basin, sit or squat carefully in it for 10-15 minutes.
Gently pat dry and do it everyday for at least a week. You can use the Soothing Postpartum Pads for extra healing & comfort!
Have you ever done a sitz bath? Have you used herbs for postpartum care? What herbs and how did they help you?

Note: The links above are my affiliate links and I will earn a small commission if you decide to order the herbs and other supplies through those links (no extra charge to you!). Thank you for reading this and supporting my family through your purchases!
]]>
Honestly, I loved getting their questions and replying back with answers to help them take a step forward to start making the best homemade ice cream right in their kitchens. As an author, it is important to me to help you all be able to accomplish that!
Below I put together the top 10 questions that have been asked and my answers to them. I hope they will be helpful to you and if you have any questions not listed here… please do not hesitate to ask in the comments below or email me! Thank you!

For sugar-free options, you will find honey, maple syrup, coconut sugar or stevia. You can learn more about the different options in the book, Just Making Ice Cream.
3. What kind of sweeteners do you use?
6. How long will it take me to make the ice cream, from start to mouth?
7. How easy is it to make your recipes?
8. How many recipes are there and can I take a peek at the list?
9. What’s your favorite recipe in the book?
I am already working on creating a 3rd edition with more pictures and recipes! I hope to have it available in printed format… oh, I would love to hold a book of Just Making Ice Cream in my own hands, someday!
Have any other questions that is not listed here? Don’t hesitate to ask in the comments below or email me!

After years of many failures and successes, plus writing an ebook devoted wholly to ice cream, I have learned several ways (or tricks, really) that you can use to get consistent results for creamy, delicious ice cream… especially, the fast way.
We all know that texture & flavor is pretty important when it comes to making homemade ice cream, especially the texture. Everyone likes their ice cream creamy and easy to scoop out of the container, but… that’s commercial ice cream.
Realistically, you just can’t compare homemade ice cream with commercial ice cream. Homemade wins, hands down, ingredient-wise and flavor-wise.
Commercial ice cream is full of hidden ingredients that help the ice cream to keep their creaminess and make scooping easier, but I am not going to go into more details on that because I already wrote all about it in my ebook, Just Making Ice Cream.

So, back to making ice cream at home… you and I have seen all those delicious, beautiful pictures of perfectly scooped homemade ice cream on Pinterest & elsewhere and often click on the links to find out how to make it in our own kitchen.
What do we find? More often than not, a recipe that calls for cooking up a custard base, chilling it for several hours or overnight and then pouring it into an ice cream maker. Here we have three potential problems…
“Hmmm, but I want it RIGHT NOW!”
“OH MAN, I wish I could make this… but I don’t have that fancy ice cream maker!”
“Ugh, is not dairy-free or egg-free!”
Ever had those thoughts? yeah, that’s what I thought…
So, today I am going to come to the rescue and share 5 ways I can help you make delicious ice cream, fast & easy… with or without a machine. Making the ice cream without a machine won’t be as fast as having an ice cream machine or even a food processor, but it will be better than nothing!
These are some of the many tips you will find in my book, Just Making Ice Cream. To learn more reasons why you should make your own ice cream and 5 other ways to make ice cream without an ice cream machine… you will have to purchase the book

5 Ways I Can Help You Make Fast & Delicious Ice Cream At Home
1. Use 100% cream. You are pretty much guaranteed to get the creamiest results if you use 100% cream. When a recipe calls for cooking up a custard with a combination of whole milk, cream and eggs… skip that and just mix everything together using 100% cream.
Personally, I often find using 100% cream is too thick for my taste. So I prefer about 20% whole milk and 80% cream (ex: 1 cup milk & 2 cups cream) or pure goat milk. You can totally adjust the amount of milk and cream to your preferences! Don’t let one technique stop you from using a different technique so you can have your ice cream in less than an hour.
When you transfer your ice cream into a container to harden in the freezer, be sure to allow it to thaw for about 10 minutes. Check it after 5 minutes because room temperature can play a hand in how quickly your ice cream will thaw.
2. Coconut milk. Can’t have dairy? No problem! Coconut milk is the best dairy-free alternative for making ice cream. The full fat version will give you the creamiest results, but you can use the light version if you don’t want a strong coconut flavor.
You can use 100% coconut milk in any recipe, just keep in mind the possibility of having some coconut flavor when eating your ice cream. I often use coconut milk when I don’t have goat milk on hand and have been very happy with the results!
Also, it is much easier to keep coconut milk in your pantry as it lasts longer on the shelf in a can then fresh cream in the fridge! So, if that desire for ice cream kicks in and you don’t have any fresh cream or whole milk… all you gotta do is pull down a can of coconut milk to save the day!
3. Use dry sweeteners. Exclusively using liquid sweeteners, such as honey & maple syrup, will cause your ice cream to be a little “icy” instead of smooth (but I personally don’t mind that too much!). Dry sweeteners, such as Rapadura, Sucanat, evaporated cane juice, coconut palm sugar and maple sugar, gives the best results for a smoother texture.
Keep in mind the flavors of the sweeteners you plan to use… some are stronger than others. When I plan to make ice cream, I think about which sweetener would combine well with the ingredients to product the best flavor. For example, I often use rapadura or sucanat or dark honey when I make a chocolate base ice cream, which help create a deep, rich flavor. When making a strawberry base ice cream, I often use light honey or evaporated cane juice. When making a caramel base ice cream, the best is coconut palm sugar and so on.
4. Use lots of egg yolks…or not. Egg yolks will increase the creaminess in texture and lessen crystallization when storing your ice cream in the freezer, plus eating raw egg yolks is so good for you!
But you can totally skip using egg yolks if you have egg allergies or need to be frugal. Using 100% cream or coconut milk is good enough to make delicious & creamy ice cream!
5. Make your ice cream in 5 easy steps. Of course, we all want an ice cream machine… I have a super nice Breville ice cream machine and use it frequently, but there was a time when I didn’t have a machine and had to get creative with making homemade ice cream without a machine. Join me in the process and you will be surprised how easy it really is!
- Prepare your ice cream mixture and make sure it is chilled before proceeding to step 2.
- Pour your ice cream mixture into a deep baking dish or bowl made of plastic, stainless steel or something durable and put in the freezer.
- After about 45 minutes, open the door and check on it. When it starts to freeze near the edges, take the ice cream out of the freezer and stir it vigorously with a spatula or whisk. Really beat it up and break up the frozen sections. Return to the freezer.
- Continue to check the mixture every 30 minutes and stir it vigorously as it is freezing. If you have one, you can use a hand-held mixer or stick blender for best results… but since we are doing it low-tech here, a spatula or sturdy whisk with a strong arm is good enough!
- Keep checking and stirring while it freezes until the ice cream is frozen. It will take about 2 to 3 hours to be ready. Transfer the ice cream to a covered storage container until ready to serve.
Think you will try making your ice cream with a strong arm and whisk? Have you made ice cream without a machine?


]]>
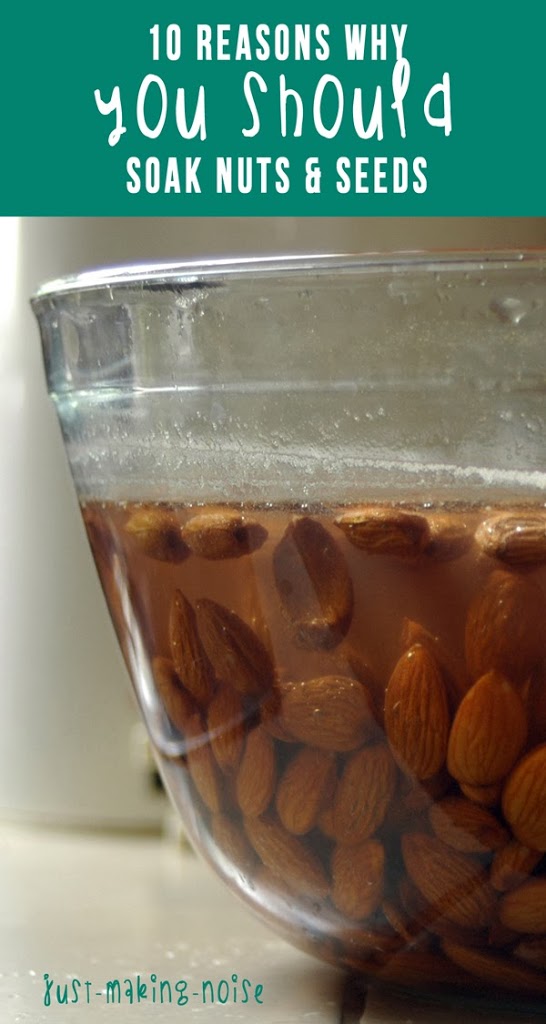
Have you ever thought about soaking your nuts and seeds before eating them? Are you already soaking your oatmeal and grains? Then you should include nuts/seeds because they all have 2 things in common… they contain phytic acids & enzyme inhibitors that can cause problems for our gut if not properly removed or reduced.
Today I am over at The Nourishing Gourmet sharing how soaking nuts & seeds helped my digestion, what I learned about nuts & seeds and how you can learn to properly prepare them in 3 simple steps.
I used to cringe at nuts & seeds growing up. I wasn’t fond of the waxy, slightly bitter taste or the bland texture. My parents would often put out a bowl of trail mix… I would always eat the M&M’s and dried fruits instead of the nuts. When I did force myself to eat a handful or two, I didn’t like how I felt afterwards… my stomach would sometimes feel heavy & aching. My head would hurt. My mouth sometimes felt funny and I often got tired & cranky.
I was told these guys were supposed to be healthy and a great source of energy for those who were active in sports!! Not so for me. I thought it was because I’m more of a “carb” person and couldn’t handle a lot of protein.
Fast forward to several years later, through research I learned that I was basically experiencing mild nut/seed allergies and that my body was telling me my digestive system was under a lot of stress trying to digest them.
Now, I can digest and throughly enjoy nuts/seeds with no problems! You can continue to read my story over at The Nourishing Gourmet, but before you head over there to read how soaking nuts & seeds helped my digestion… please read through these 10 reasons why you should soak nuts & seeds.

Soaking Nuts & Seeds…
When the phytic acid and enzyme inhibitors are removed, it basically sets the vitamins and minerals free to be easily absorbed by the body.
6. Helps make the proteins more easily available for absorption.
Phytic acid inhibits two specific enzymes needed to make the proteins easier to digest and absorb, Pepsin and Trypsin. Pepsin is needed to help breakdown the proteins in the stomach and Trypsin is needed for protein digestion in the small intestine. Tannins also prevents the body from properly absorbing the proteins and is removed during the soaking process.
Diets high in phytate (phytic acid) cause mineral deficiencies. Again, we know that when phytic acid is eaten, the acid binds itself to minerals like iron, magnesium, zinc, calcium, manganese and chromium in the gut. Thankfully, soaking helps deactivate the phytic acid to allow the minerals to be absorbed in the body.
Studies show that we absorb about 20% more zinc and 60% more magnesium from our food when phytic acid is removed. It is important to note that phytic acid does not leach minerals that are already stored in the body… it only prevents the absorption of minerals from food where phytic acid is present.
Ready to Get Started?
You can easily learn how to properly prepare your nuts & seeds using 3 simple steps and the soaking times varies for each nut and seed. Be sure to give this a try at least once… that’s all it took for me to be won over!
Think you will start soaking your nuts & seeds? Your gut will profusely thank you if you did!
references:
Food Enzymes for Health & Longevity by Dr. Edward Howell
Nourishing Traditions by Sally Fallon
http://www.ncbi.nlm.nih.gov/pubmed/4111248
http://www.westonaprice.org/food-features/living-with-phytic-acid
http://www.ajcn.org/content/47/2/270.full.pdf
http://www.ncbi.nlm.nih.gov/pubmed/2998440
http://www.whfoods.com/genpage.php?tname=george&dbid=250
http://www.westonaprice.org/food-features/living-with-phytic-acid
http://science.howstuffworks.com/life/cellular-microscopic/cell2.htm
http://www.ajcn.org/content/47/2/270.full.pdf
http://www.alive.com/articles/view/17406/the_best_colon-cleansing_diet
Hope you all had a wonderful Christmas and looking forward to a great New Year!
Did you miss me?
This pass month was a busy time of ministry, birthdays, family visiting and Christmas. So, I decided to take a step back from my blog and computer in general.
I really needed that break.
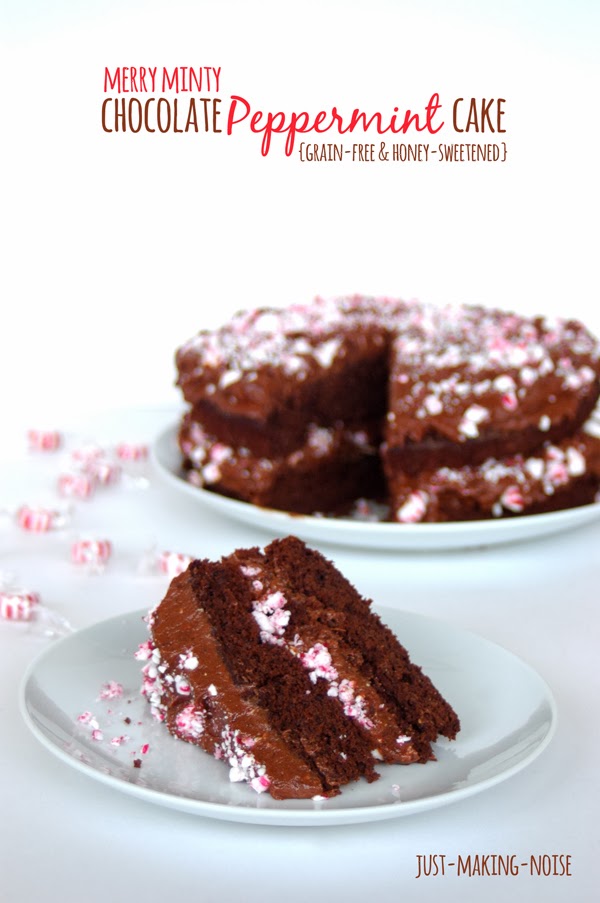
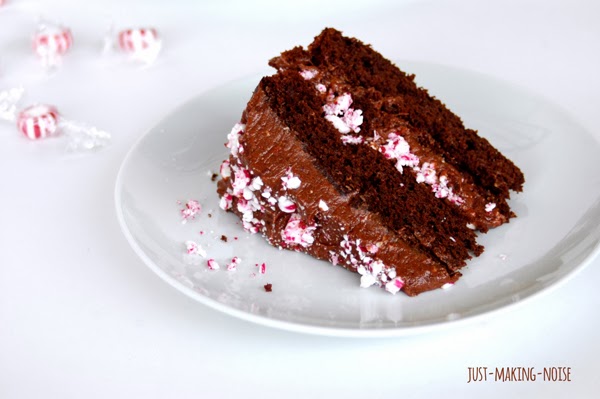
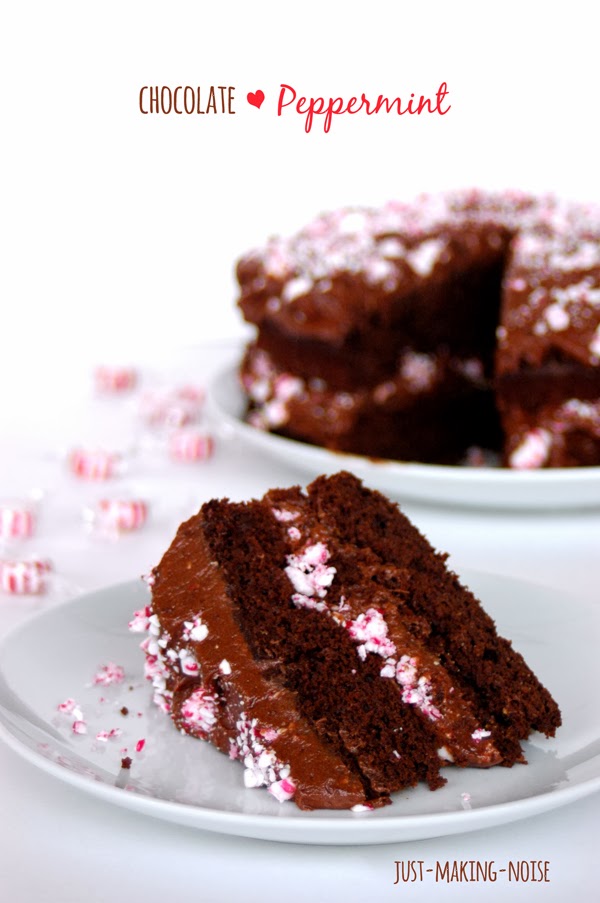
Cool, creamy, minty, rich and so nourishing… this cake is simply divine, easy to make, loaded with healthy fats & protein and deliciously grain-free.
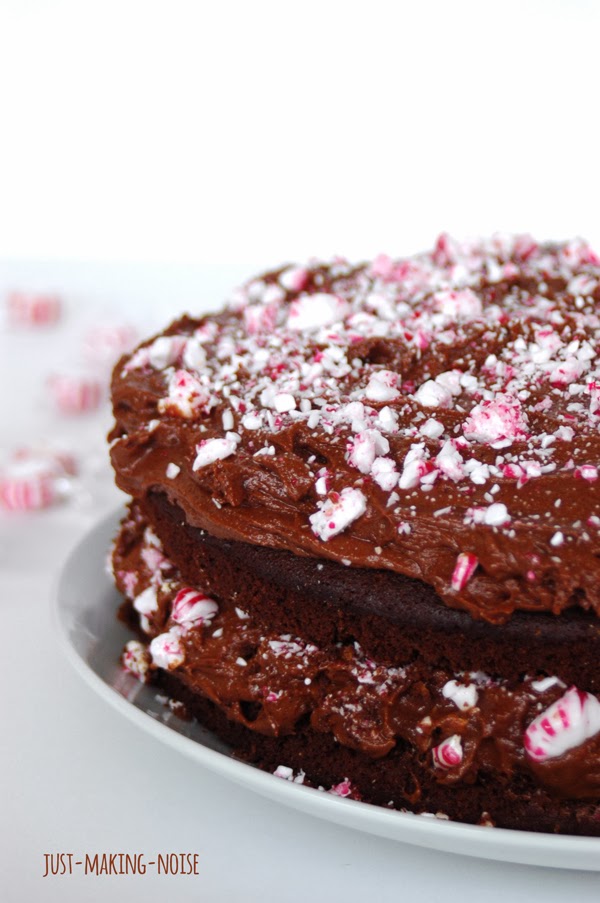
Plus, everything about this cake is, well… minty. The cake is minty, the frosty is minty and crushed peppermints topping it off, making it literally a “merry” minty cake.
I had so much fun making this cake… and eating the leftover frosting with crushed peppermints on a big spoon.
Oh, yes I did do that. Yum.
My mouth just tingles thinking about it!
I have to tell you that this frosting only requires THREE ingredients… butter, chocolate chips and peppermint extract. Or for those who need it to be dairy-free… thick full-fat coconut milk, chocolate chips (Enjoy Life is dairy-free) and peppermint extract.
Can you believe that?! Totally fail-proofed and guaranteed to whip up beautifully, oh yesss. That’s my kind of frosting.
To be honest, I typically shy away from making cakes and frostings. They never seem to turn out well for me, but I wanted to give it a go this time around because…
It was for my little man’s 3rd birthday.
I had to try!
My girls’ had lovely rainbow cupcakes for their birthdays this year and I didn’t want him to feel that he wasn’t special enough to have a cake too.
Plus, I am a baker, for crying out loud! I should be able to make a cake… and frosting!
Anyway…
He was so excited to have a birthday cake. He kept running up to me and saying, “that’s MY birthday cake!” and “that birthday cake is for ME!“… then his face would light up with that adorable grin of his that simply melts my heart and I am so sure it will melt the hearts of many young latina girls in the not-so-distance future!
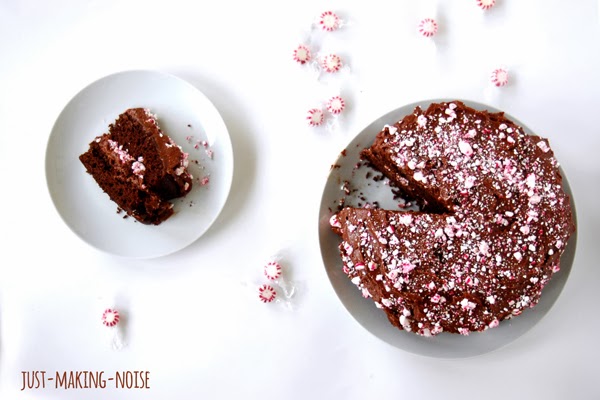


Now, I think it’s time to head into the kitchen and make another one of these double-layer Merry Minty Chocolate Peppermint Cake for our New Year celebration… you should do the same. I’m sure you have some leftover peppermint candies lying around that need to get used up 
3/4 cup coconut flour
1/4 cup arrowroot powder
3/4 cup cacao powder
1 tsp baking soda
1/2 tsp baking powder
3/4 tsp sea salt
8 eggs
3/4 cup coconut oil or butter, melted (plus more for greasing pans)
1 cup honey
1/2 cup milk (regular or coconut)
1/4 cup strong coffee (or coffee substitute)
1 Tbsp apple cider vinegar or lemon juice
2 Tbsp peppermint extract
Chocolate Peppermint Frosting (recipe below)
Crushed peppermint candy
- Preheat oven to 350 degrees F.
- Grease two 9-inch cake pans and line the bottoms with parchment paper.
- Mix together coconut flour, arrowroot, cacao, baking soda, baking powder and sea salt in a small bowl and set aside.
- In the bowl of a stand mixer, with whisk attachment, whisk the eggs.
- Add oil/butter, honey, milk, coffee, ACV or lemon juice and peppermint. Continue to mix until combined.
- Add the dry ingredients into the wet ingredients and mix on low speed until ingredients are incorporated.
- Stop the mixer and scrap down the sides (you might need to do this a couple times).
- Turn mixer back on and beat on high speed for about one full minute to make the batter fluffy.
- Divide the batter between the two prepared pans.
- Bake for 25 to 30 minutes. Check at 25 minutes with a toothpick… it should come out with a few moist crumbles. Don’t overbake or the cake will be dry. If it is still too moist, bake for another 2 to 5 minutes (the cake was perfect at 27 minutes for me).
- Allow to cool on a wire rack for about 10 to 15 minutes. Use a knife to loosen the sides of the cakes from the pans and turn them out onto the wire rack and allow to cool completely.
2 cups chocolate chips
2 cups butter or full-fat coconut milk
2 tsp peppermint extract
- In a medium saucepan, melt chocolate chips and butter over medium low heat. Stirring frequently to keep from burning.
- When melted, turn of heat and stir in peppermint extract.
- Let it cool completely and chill in the fridge until solid.
- Remove from fridge and allow it to come to room temperature. You will have to eye-ball this as you don’t want it too warm that it becomes more of a gooey mess, but you don’t want it too firm that it just balls up inside the whisk.
- Scoop the mixture into a mixing bowl and beat on medium for about 2 minutes or until light in color and fluffy.
Using coconut milk:
Chill can of full-fat coconut milk in the fridge overnight. When ready, open can and pour off the water (save it for smoothie or toss out). Scoop only the solid white coconut cream into a medium pot. Add the chocolate chips and follow the instructions listed above.
Putting together the cake (the fun part!):
- Carefully move one of the cakes unto a serving plate of your choice.
- Top it thickly with Chocolate Peppermint Frosting and sprinkle with crushed peppermint candy (don’t be shy with this!).
- Carefully put the second cake on top and top it off with the rest of the frosting.
- Sprinkle more crushed peppermint candy.
- Enjoy!
This post is part of the Nourishing Progressive Dinner for the Holidays. Please check out what these bloggers have whipped up for this special event!

This post may contain affiliate links. If you purchase a product through an affiliate link, your cost will be the same but I will receive a small commission. The commissions I receive goes to support my family, our ministry and helps keep my blog going. Thank you for your willingness to use the links to support us & help me keep Just Making Noise going!
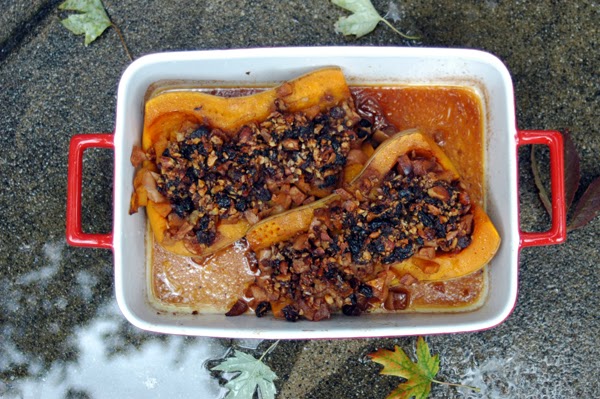
1 butternut squash
1 large apple, chopped
1 tsp cinnamon
2 Tbsp maple syrup
1 tsp vanilla extract
- Preheat oven to 375 F
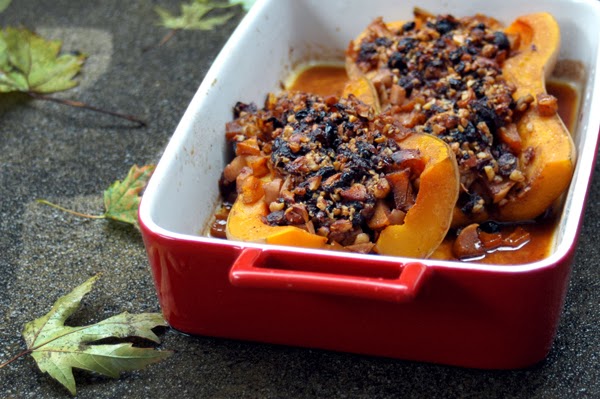
- Cut the squash in half and scoop out the seeds. Cut the flesh in the center along the neck, enough to make a ditch to put the stuffing in. Chop up the flesh that has been cut out.
- In a medium bowl, mix together apples, butternut squash, cinnamon, maple syrup and vanilla.
- Put the butternut squash in a pan, facing up and divide the apple/butternut mixture between the 2 halves.
- In a small bowl, mixed together nuts, dried fruit, butter, maple syrup, sea salt and cinnamon.
- Put the crumble topping over the apple/butternut mixture.
- Cover the pan with parchment paper or foil and bake for 40 minutes.
- After 40 minutes… uncover, scoop up any juice and drizzle over the squash and bake, uncovered, for another 20 minutes or until the flesh of the butternut squash is soft.
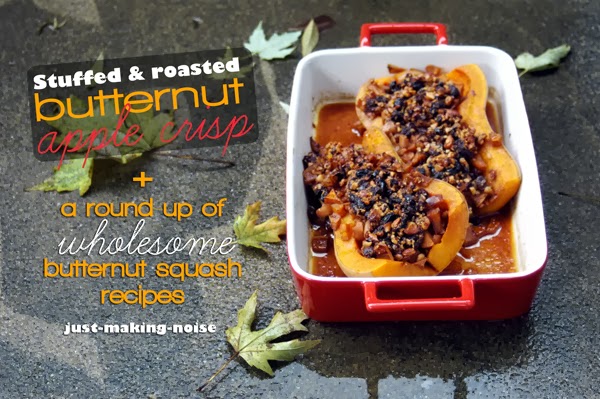
Enjoy it hot as it is or serve some homemade ice cream alongside it. I’m sure the Horchata Ice Cream would be fantastic with this!
Looking for more butternut squash recipes? See below!
Round-up of Wholesome Butternut Squash Recipes
Here’s what I have found so far among my real food blogging friends, but I plan to update this list in the years to come. Enjoy!
- Butternut Ice Cream from Stacy Makes Cents
- Curried Butternut Squash Soup From Red and Honey
- Apple, Raisin & Butternut Squash Spiced Chutney from Keeper of the Home
- Lacto-fermented Mango, Peanut Butter & Chutney Spiced Smoothie from My Humble Kitchen
- Butternut Apple Bake from Stacy Makes Cents
- Butternut Squash Fries from The Nourishing Gourmet
- Butternut Squash Smoothie from Amazing Grace Farms
- Crock Pot Morrocan Chicken Stew from Stacy Makes Cents
- Butternut Squash Bisque from Smithspiration
- Crock Pot Butternut Applesauce from Stacy Makes Cents
- Spiced Butternut Squash & Chicken from For the Family
- Butternut Squash Pasta Sauce from The Nourishing Gourmet
- Garlicky Baked Butternut Squash from Whole Intentions
- Bacon & Butternut Squash Risotto from Modern Alternative Kitchen
Do you have a favorite recipe with butternut squash? Please share in the comments below!
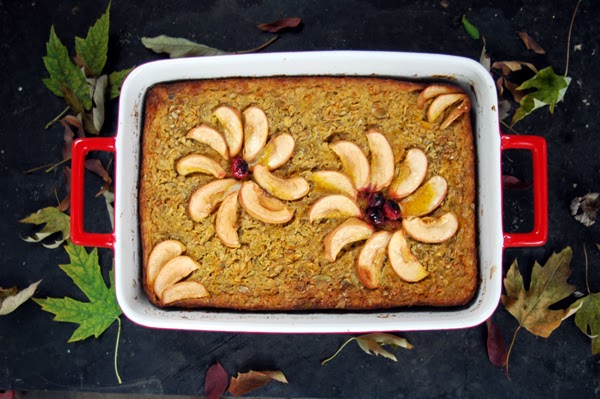
Good morning my friends!
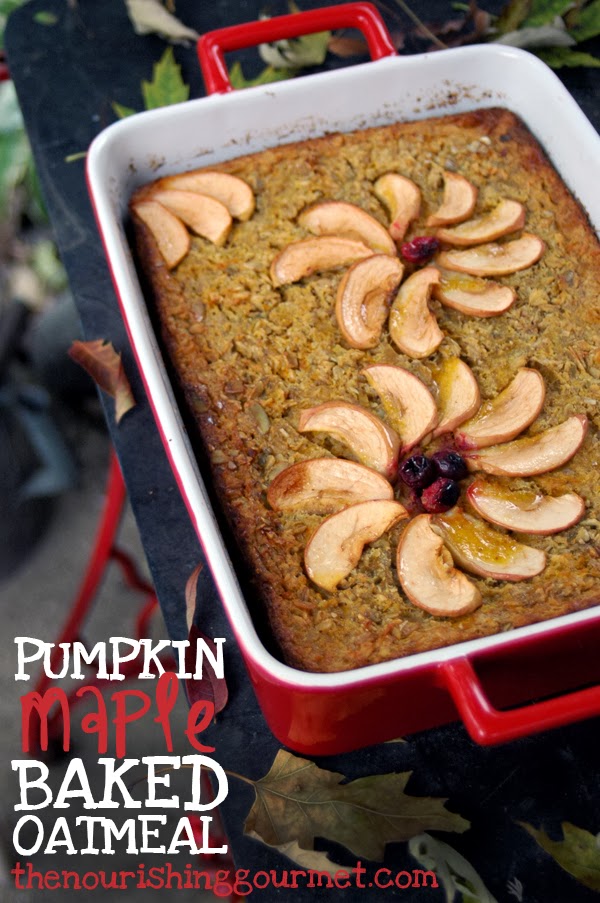
Would you all like to start off your day with a slice of warm, spiced pumpkin oatmeal bake topped with large scoop of butter and drizzled with maple syrup?
My family loves a good baked oatmeal. It’s a frugal, hearty & nourishing way to start off our day… plus, the leftovers make great snacks, warm & cold.
Baked oatmeal is awesome for making my mornings easy, especially on busy days or when I need a little extra sleep.
I am sharing this yummy Pumpkin Maple Baked Oatmeal over at The Nourishing Gourmet.
If Pumpkin Maple doesn’t sound appealing to you… how about trying Spiced Cranberry Apple or Strawberry Pineapple. These two, along with Pumpkin Maple, are our favorites!
Have a wonderful week and enjoy your slice of Maple Pumpkin oatmeal bake!